Original Article
On iPhone 16 Pro and iPhone 16 Pro Max, the Voice Memos app includes a recording feature that lets you record a second audio layer – like vocals, narration, or an extra instrument – over an existing memo, all without needing headphones. Keep reading to learn how it's done.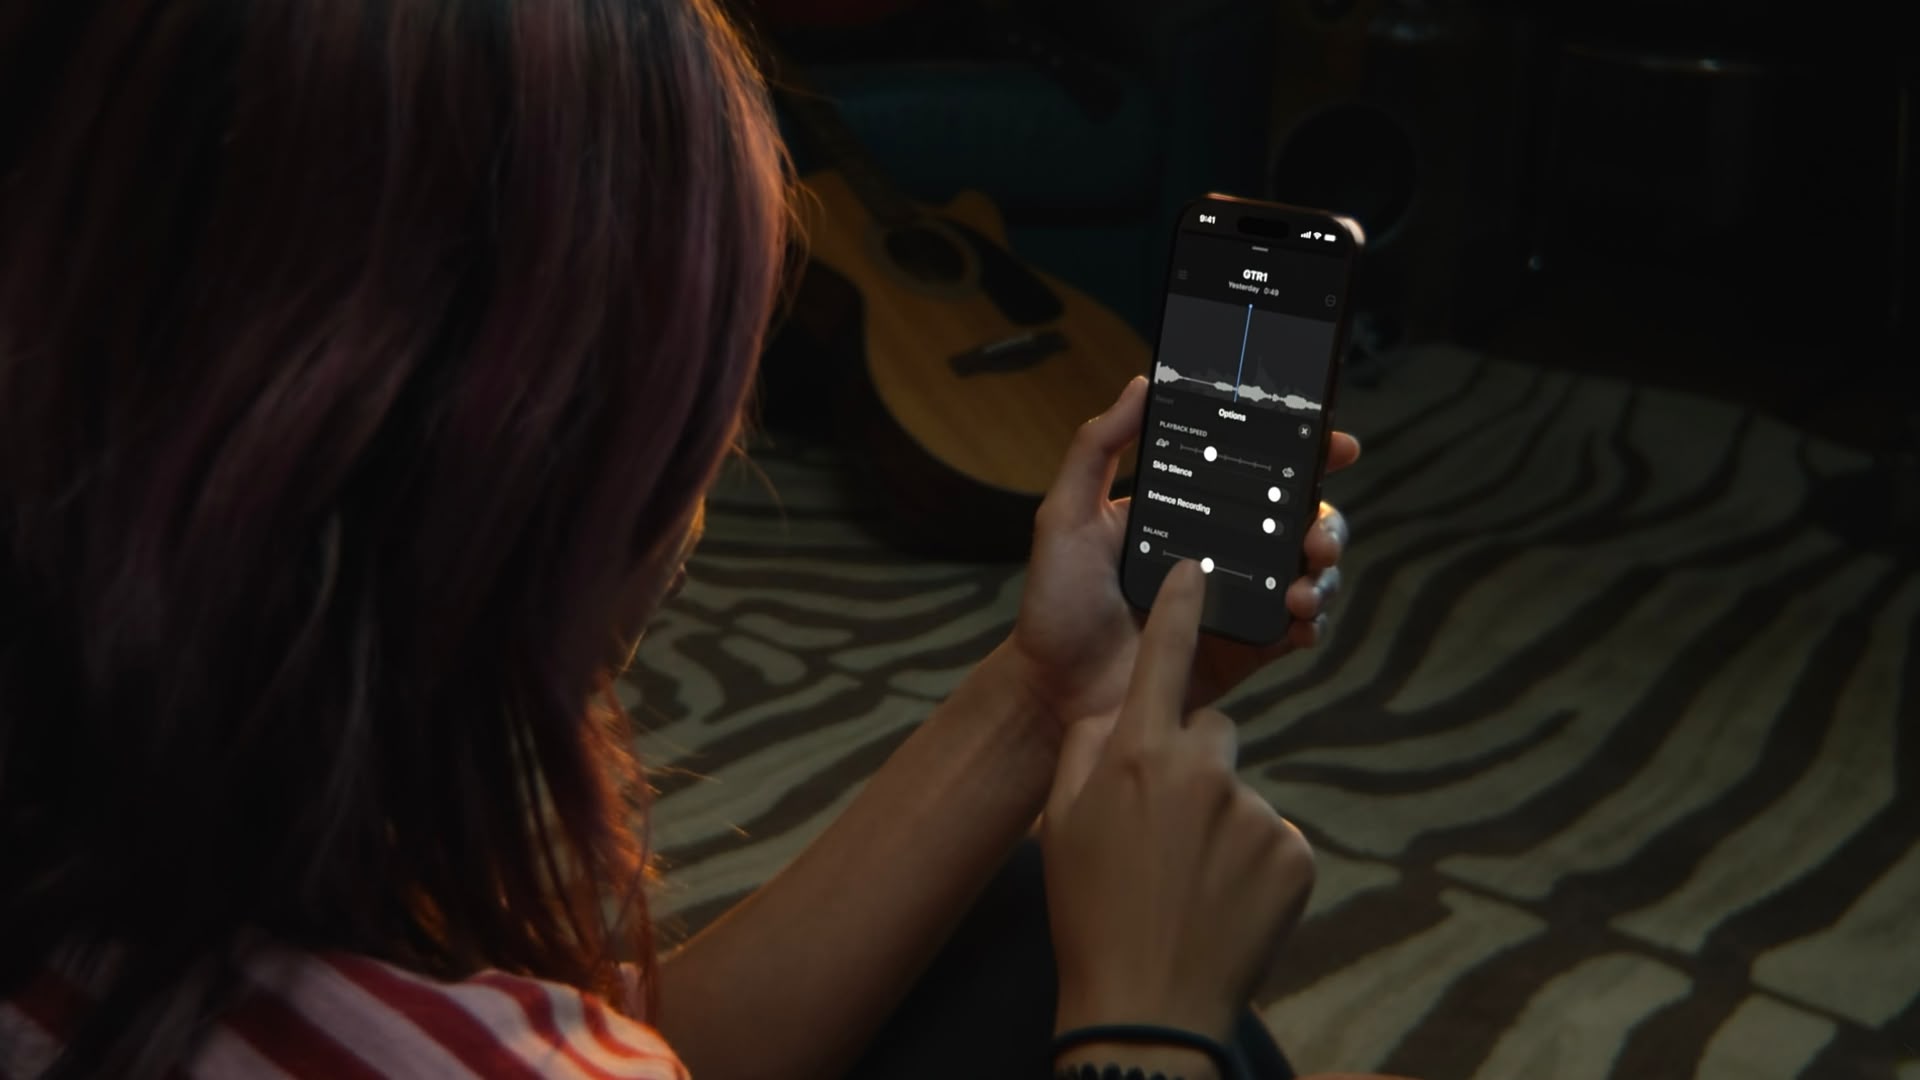
Thanks to the A18 Pro chip's advanced audio processing, iPhone 16 Pro models can play an original Voice Memo recording through the speakers while simultaneously isolating and capturing new audio cleanly. Whether you're capturing a quick harmony, adding context to a saved memo, or simply experimenting with sound, layering recordings like this offers a seamless way to capture richer ideas.
Once finished, layered recordings can be edited, separated, and fine-tuned directly on the iPhone or easily transferred to apps like Logic Pro for more advanced mixing. For musicians, podcasters, or anyone who regularly records voice notes, it's a bit like having a mini studio setup right in your pocket. Here's how to make your first layered recording.
Add a Second Layer to a Recording
- Open the Voice Memos app (in the Utilities folder) on your iPhone.
- Tap the recording you want to add a vocal layer to, then tap the waveform icon to view the waveform.
- Tap the plus (+) button.
- When you're ready to record the second layer, tap the red record button.
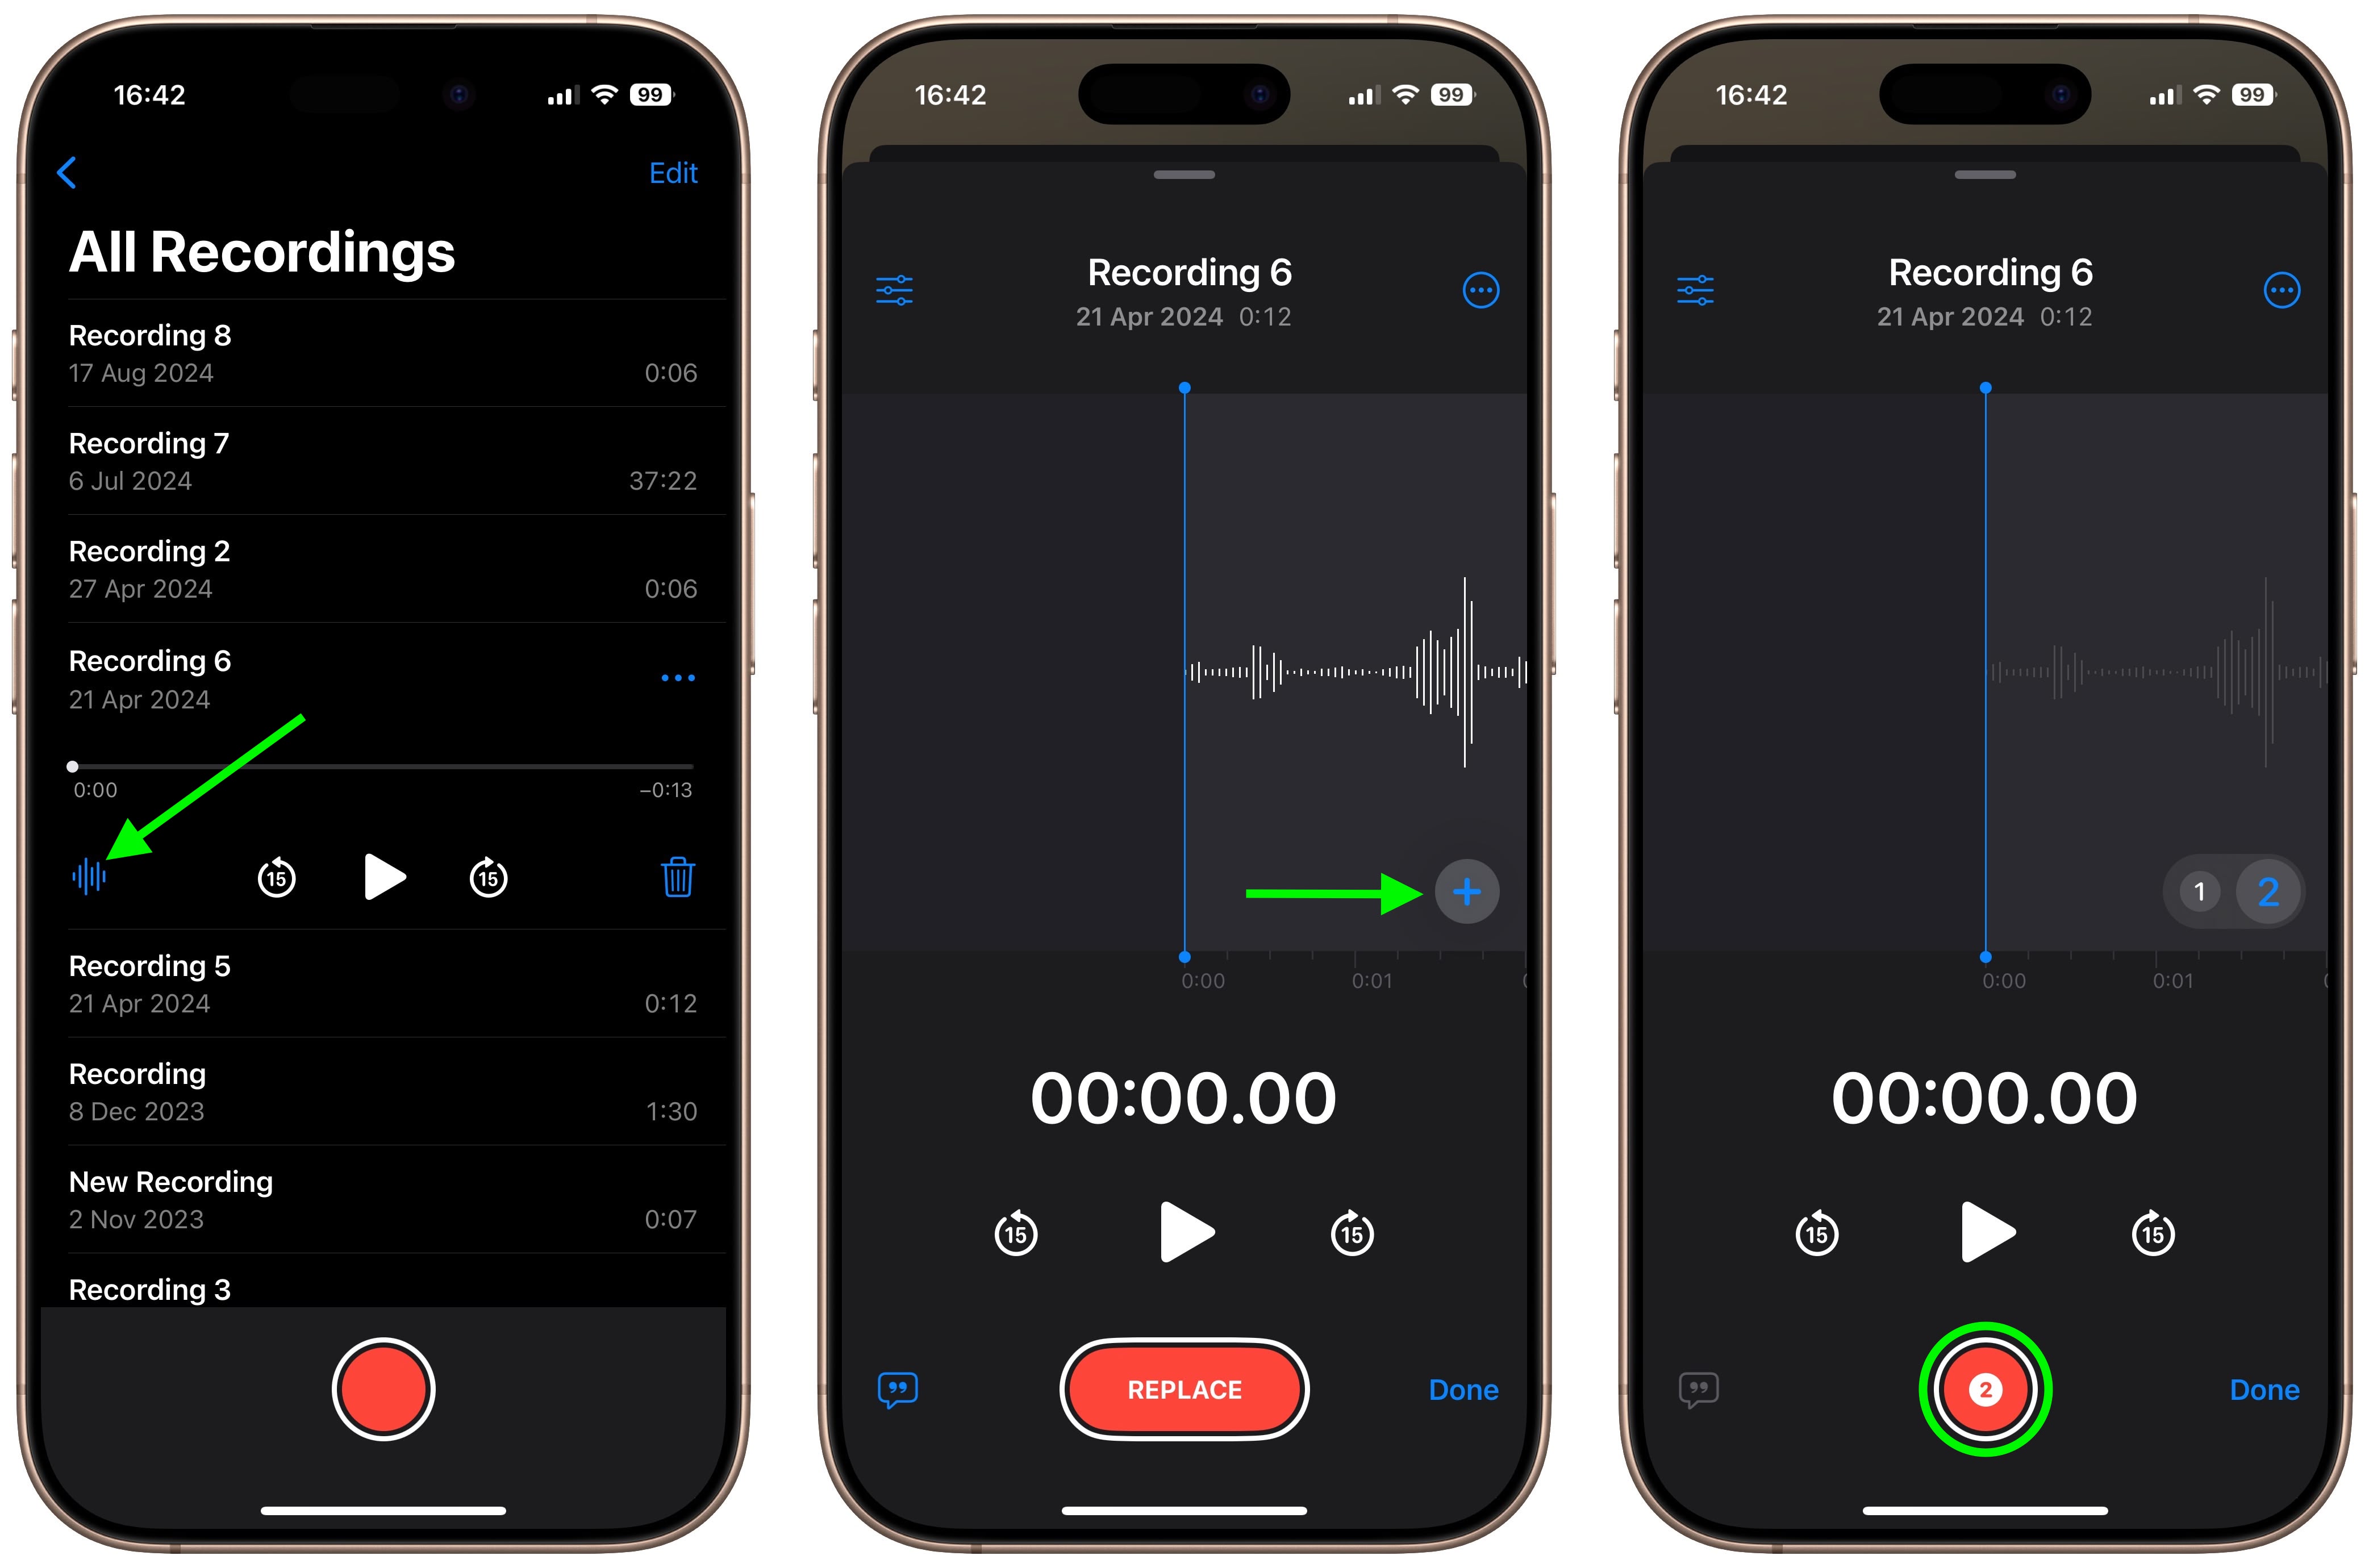
The recording will appear in Voice Memos' list of recordings with a layered symbol (two overlapping tiles) next to it.
Mix the Layers
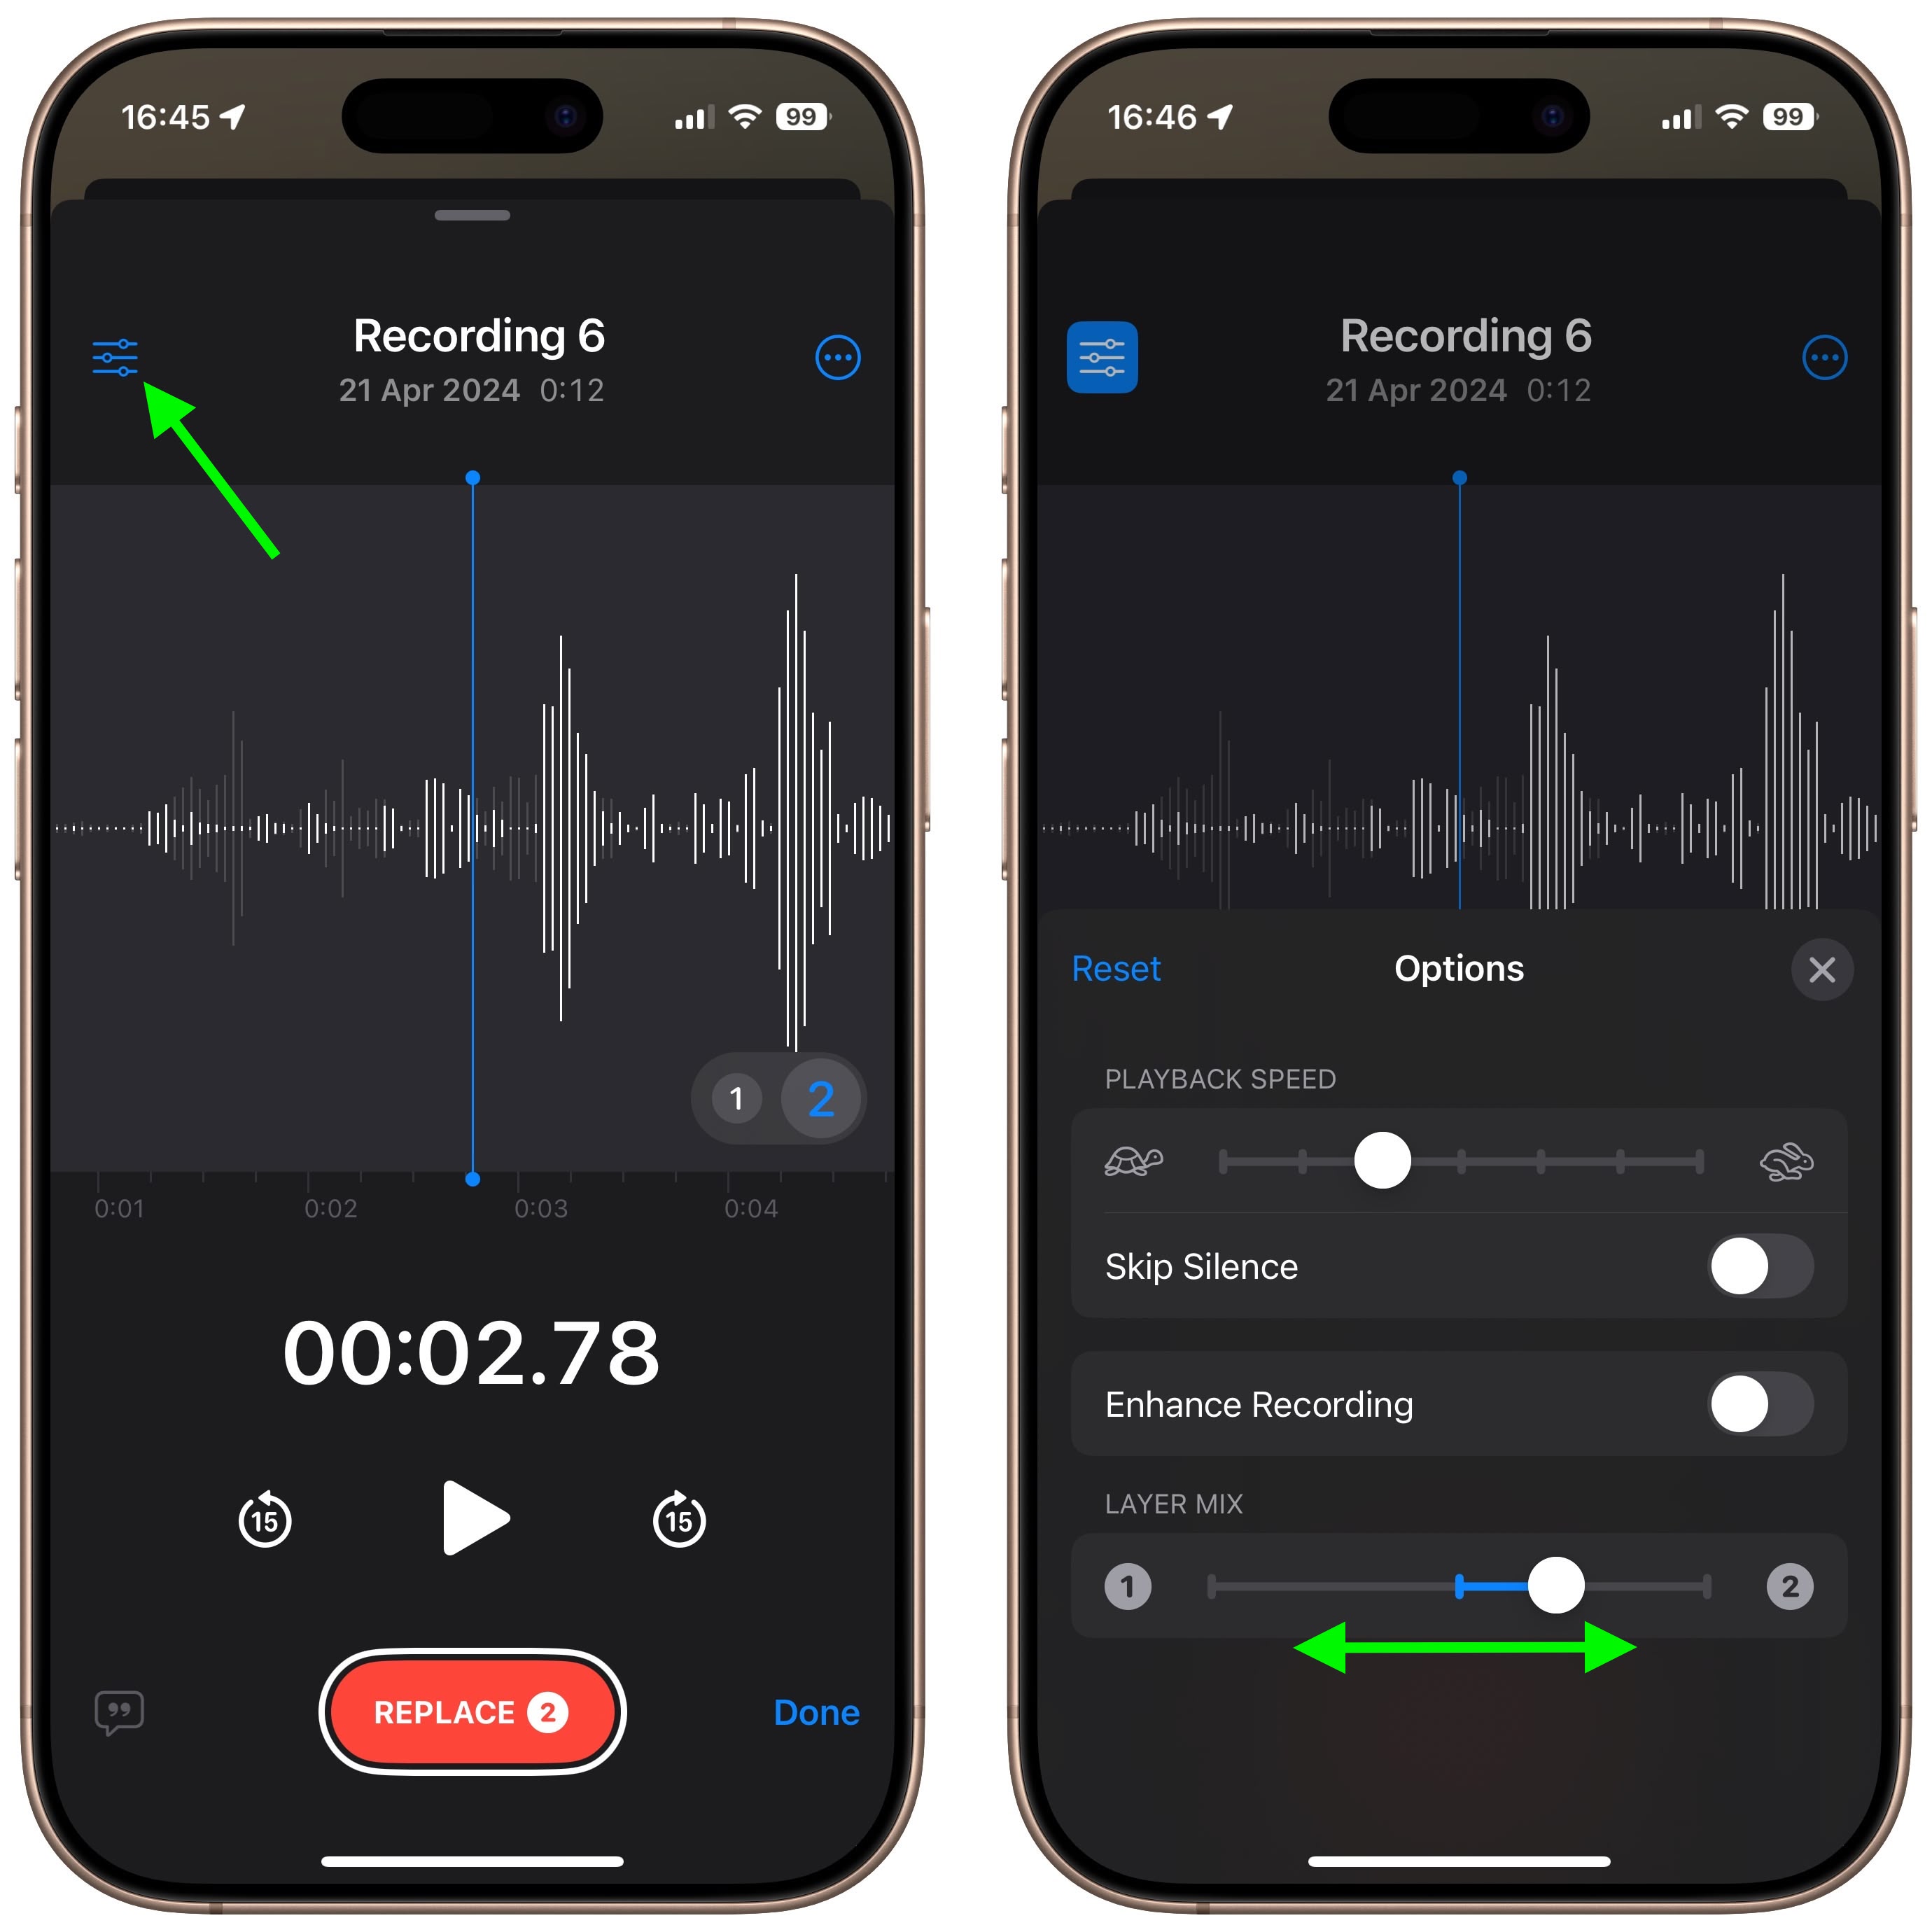
While viewing the waveform, you can easily mix the layers by tapping the settings button in the top-left corner and dragging the Layer Mix slider.
Separate the Layers
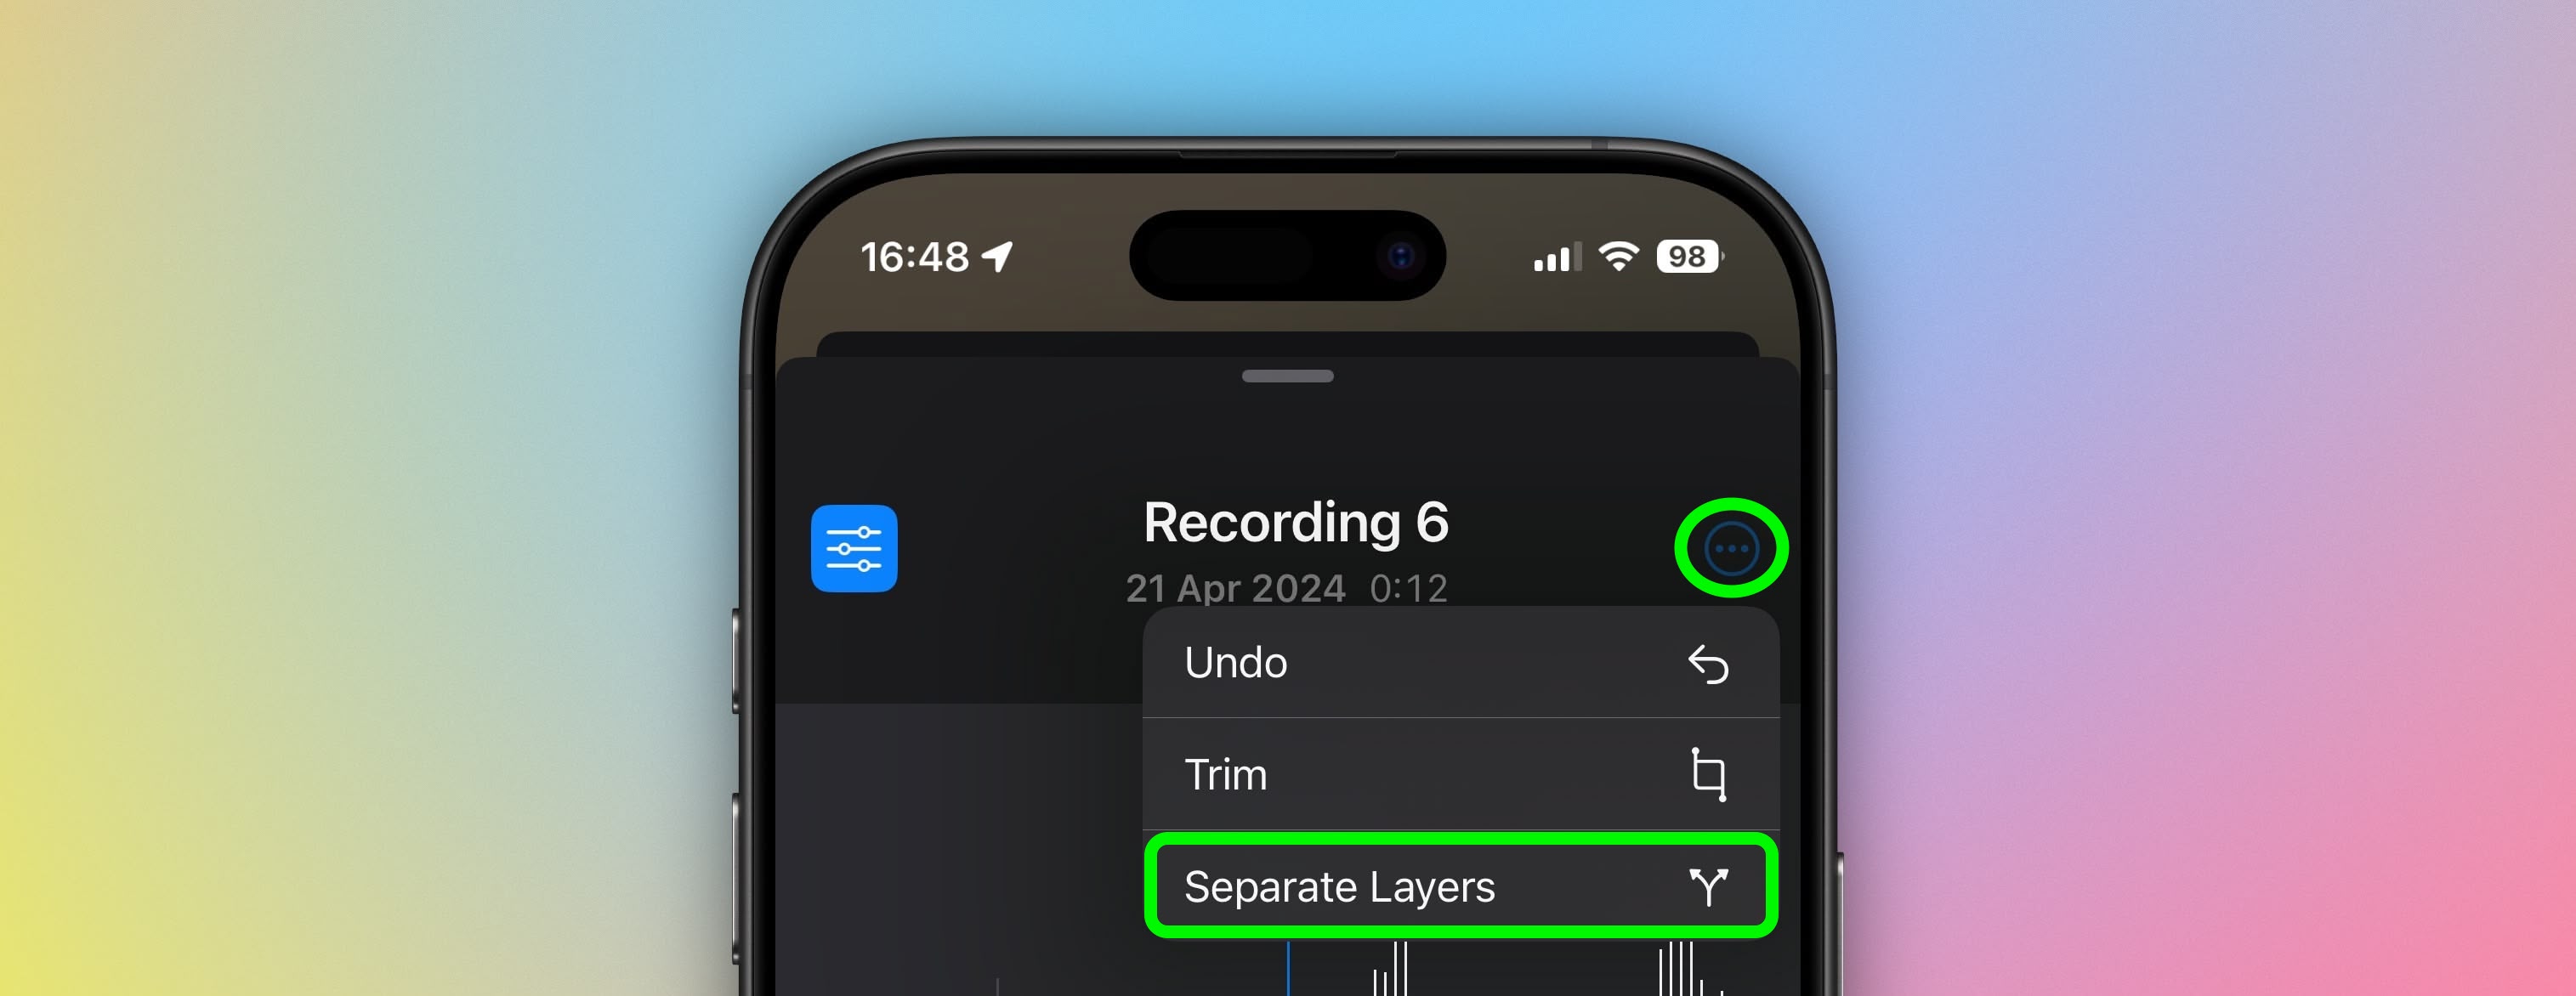
You can also separate the two layers to edit or play them separately: Simply tap the More button (three encircled dots) in the top-right corner, then tap Separate Layers. If you then tap Done, you'll see the two layers appear as separate recordings in the list. From there, you can select them, edit them, and play them separately.
Things to Know
While creating layered recordings is exclusive to the iPhone 16 Pro and iPhone 16 Pro Max, playback is more widely supported. Any device running iOS 18.2, iPadOS 18.2, macOS Sequoia 15.2, or later can play layered recordings without issue.

It's worth noting that layered recordings are saved in the QuickTime Audio (QTA) format. Devices on earlier software versions, such as iOS 18.1, iPadOS 18.1, or macOS Sequoia 15.1, won't display layered memos. However, if you separate the layers, each track is converted into an individual .m4a file, making them accessible across older devices. Also, keep in mind that only the original layer can be transcribed or recorded in stereo – additional layers are captured in mono.
This article, "Get Creative With Sound by Layering Tracks in Voice Memos" first appeared on MacRumors.com
Discuss this article in our forums
Comments